Installing attachments on an electric mini digger is a crucial skill that can significantly enhance the versatility and functionality of this powerful piece of equipment. As a supplier of Electric Mini Diggers, I’ve had the opportunity to work closely with customers, guiding them through the attachment installation process. In this blog, I’ll share a comprehensive guide on how to install attachments on an electric mini digger, ensuring that you can make the most of your machine’s capabilities.
Understanding Your Electric Mini Digger and Attachments
Before you start the installation process, it’s essential to have a clear understanding of your electric mini digger and the attachments you plan to use. Different models of electric mini diggers may have specific requirements and compatibility issues with certain attachments. Therefore, it’s crucial to refer to the manufacturer’s manual for both the digger and the attachment to ensure a proper fit.
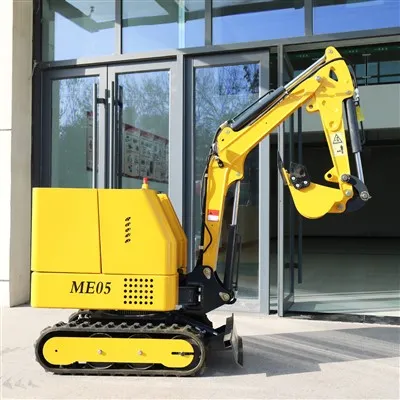
Our company offers a wide range of electric mini diggers, including the Electric Crawler Excavator, Mini Excavator for Indoor Use, and Lithium Battery Power Mini Excavator. Each of these models is designed to work with specific types of attachments, and it’s important to choose the right combination for your project.
Pre-Installation Preparations
Safety First: Always prioritize safety when working with heavy equipment. Wear appropriate personal protective equipment (PPE), including hard hats, safety glasses, gloves, and steel-toed boots. Make sure the work area is clear of any obstacles or hazards.
Inspect the Digger and Attachment: Thoroughly inspect both the electric mini digger and the attachment for any signs of damage or wear. Check the hydraulic lines, pins, and connections to ensure they are in good condition. If you notice any issues, address them before proceeding with the installation.
Gather the Necessary Tools: Depending on the type of attachment you’re installing, you may need a variety of tools, such as wrenches, sockets, and hydraulic hose connectors. Make sure you have all the necessary tools on hand before you start the installation process.
Step-by-Step Installation Process
Position the Digger: Park the electric mini digger on a flat, stable surface and engage the parking brake. Lower the boom and bucket to the ground to ensure the machine is in a safe and stable position.
Disconnect the Power: Before you start working on the digger, disconnect the power source to prevent any accidental activation of the hydraulic system. This may involve turning off the battery switch or unplugging the charger.
Remove the Existing Attachment (if applicable): If you’re replacing an existing attachment, you’ll need to remove it first. This typically involves removing the pins or bolts that secure the attachment to the digger’s arm. Use the appropriate tools to loosen and remove the fasteners, and carefully lift the attachment off the arm.
Prepare the New Attachment: Inspect the new attachment to ensure it’s clean and free of any debris or damage. Check the hydraulic connections and make sure they are compatible with the digger’s hydraulic system. If necessary, lubricate the pins and connections to make the installation process easier.
Align the Attachment: Carefully position the new attachment over the digger’s arm, aligning the holes in the attachment with the holes in the arm. Make sure the attachment is properly seated and centered on the arm before proceeding.
Insert the Pins or Bolts: Once the attachment is aligned, insert the pins or bolts through the holes in the attachment and the arm. Use the appropriate tools to tighten the fasteners securely, but be careful not to over-tighten them, as this can damage the attachment or the digger.
Connect the Hydraulic Lines: If the attachment requires hydraulic power, you’ll need to connect the hydraulic lines to the digger’s hydraulic system. Make sure the connections are clean and free of any debris or damage, and use the appropriate tools to tighten the fittings securely.
Test the Attachment: Once the attachment is installed and the hydraulic lines are connected, reconnect the power source to the digger. Start the machine and test the attachment to make sure it’s working properly. Operate the attachment through its full range of motion, checking for any leaks, unusual noises, or other issues.
Post-Installation Checks
Inspect the Installation: After testing the attachment, inspect the installation to make sure everything is secure and properly aligned. Check the pins, bolts, and hydraulic connections to ensure they are tight and free of any damage.
Clean Up the Work Area: Remove any tools or debris from the work area, and make sure the digger and attachment are clean and free of any dirt or grease.
Store the Tools Properly: Store the tools in a safe and secure location, making sure they are properly maintained and ready for future use.
Troubleshooting Common Issues
Even with proper installation and maintenance, you may encounter some issues with your electric mini digger attachments. Here are some common problems and their solutions:
Hydraulic Leaks: If you notice hydraulic fluid leaking from the attachment or the digger, stop using the machine immediately and check the hydraulic connections. Tighten any loose fittings or replace any damaged seals or hoses.
Attachment Not Working Properly: If the attachment is not working properly, check the hydraulic pressure and flow rate. Make sure the hydraulic lines are not blocked or kinked, and check the attachment’s control valves to ensure they are functioning correctly.
Excessive Noise or Vibration: If you notice excessive noise or vibration from the attachment, stop using the machine immediately and check for any loose or damaged parts. Tighten any loose bolts or pins, and replace any damaged components.
Conclusion
Installing attachments on an electric mini digger is a relatively straightforward process, but it requires careful attention to detail and proper safety precautions. By following the steps outlined in this blog, you can ensure that your attachments are installed correctly and working properly, allowing you to make the most of your electric mini digger’s capabilities.
If you have any questions or need further assistance with installing attachments on your electric mini digger, please don’t hesitate to contact us. As a leading supplier of Electric Mini Diggers, we have the expertise and experience to help you choose the right attachments for your project and ensure a successful installation. We look forward to working with you to meet your excavation needs.
References
Manufacturer’s manuals for electric mini diggers and attachments
Industry best practices for heavy equipment installation and maintenance