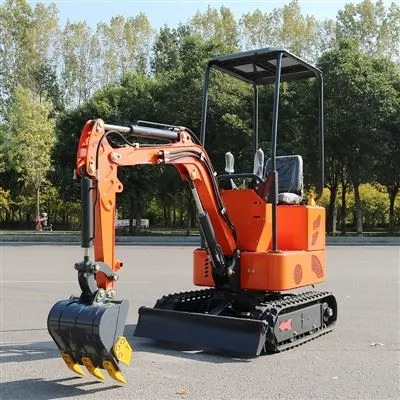
Hey there! As a supplier of Mini Small Excavator, I’ve seen my fair share of damaged buckets on these little workhorses. Mini small excavators are super handy for all sorts of jobs, from landscaping to small construction projects. But like any piece of equipment, their buckets can take a beating over time. In this blog, I’m gonna walk you through how to repair a damaged bucket of a mini small excavator.
Step 1: Inspection
First things first, you gotta take a good look at the bucket. Is it just a few small dents, or are there some major cracks? Check the teeth, the cutting edge, and the sides of the bucket. If the teeth are loose or broken, they’ll need to be replaced. A damaged cutting edge can make it hard for the excavator to dig properly. And cracks in the bucket can lead to more serious problems down the road if not fixed.
Sometimes, the damage might be hidden under dirt and debris. So, give the bucket a good clean before you start inspecting. You can use a pressure washer or a high – powered hose to get rid of all the gunk. This way, you’ll be able to see the full extent of the damage.
Step 2: Gathering Tools and Materials
Once you know what needs to be fixed, it’s time to gather your tools and materials. For minor repairs, you might need a hammer, a chisel, and some welding equipment. If you’re replacing the teeth, you’ll need the right size and type of teeth for your Mini Hydraulic Excavator bucket. You can usually find these at your local construction equipment supply store or order them online.
For welding, make sure you have the right type of welding rod. The type of metal the bucket is made of will determine the welding rod you need. Most mini excavator buckets are made of high – strength steel, so you’ll need a rod that’s compatible with this type of metal. Also, don’t forget safety gear like welding gloves, a welding helmet, and safety glasses.
Step 3: Fixing Small Dents
If you’ve got some small dents in the bucket, you can try to fix them yourself. First, heat the dented area with a torch. This will make the metal more malleable. Then, use a hammer and a chisel to gently tap the dented area back into shape. Be careful not to over – hammer, as this can cause more damage.
If the dent is in a hard – to – reach area, you might need to use a hydraulic press or a specialized dent – pulling tool. These tools can be a bit expensive, but they can save you a lot of time and effort in the long run.
Step 4: Repairing Cracks
Cracks in the bucket are a more serious issue. You’ll need to weld them up to prevent them from getting worse. Start by cleaning the crack thoroughly. Use a wire brush to remove any rust or debris from the area around the crack. Then, use a grinder to bevel the edges of the crack. This will help the welding rod penetrate the metal better.
When you start welding, make sure you use the right welding technique. For high – strength steel, a multi – pass welding process is usually recommended. This means making several passes with the welding rod to build up the weld and ensure a strong bond. After welding, let the area cool down slowly. You can use a heat – resistant cloth to cover the welded area and prevent it from cooling too quickly, which can cause the metal to become brittle.
Step 5: Replacing Teeth
If the teeth on your bucket are damaged or worn out, they need to be replaced. Most mini excavator teeth are held in place with a retaining pin. Use a hammer and a punch to remove the old retaining pin. Then, carefully remove the old tooth.
When installing the new tooth, make sure it fits properly. Line up the hole in the tooth with the hole in the bucket and insert the new retaining pin. Tap the pin in with a hammer until it’s secure. Make sure the tooth is straight and doesn’t wobble.
Step 6: Resurfacing the Cutting Edge
The cutting edge of the bucket is what does most of the work when digging. Over time, it can get worn down. You can resurface the cutting edge by welding on a new piece of steel. First, measure the length of the cutting edge that needs to be replaced. Cut a piece of steel to the right size.
Then, weld the new piece of steel to the existing cutting edge. Make sure the weld is strong and even. After welding, use a grinder to smooth out the surface of the cutting edge. This will help the bucket dig more efficiently.
Step 7: Testing
Once you’ve completed all the repairs, it’s time to test the bucket. Attach the bucket back to the Mini Crawler Excavator and do a few test digs. Check to see if the bucket is digging properly and if there are any signs of further damage.
If everything looks good, you’re all set! Your mini excavator bucket is back in action.
Conclusion
Repairing a damaged bucket of a mini small excavator might seem like a daunting task, but with the right tools, materials, and a little know – how, you can do it yourself. Regular maintenance and timely repairs can extend the life of your excavator bucket and save you money in the long run.
If you’re in the market for a new Mini Small Excavator or need more information about our products, don’t hesitate to reach out. We’re always here to help you with your construction equipment needs. Whether you’re a professional contractor or a DIY enthusiast, we’ve got the right excavator for you. Contact us today to start the procurement and negotiation process, and let’s find the perfect solution for your projects.
References
Construction Equipment Maintenance Handbook
Mini Excavator Owner’s Manuals